How to use Better Teaching Solutions (BTS) to enroll students?
The student enrollment tools in Better Teaching Solutions let you add students to a list and easily edit or correct their details later. When you update a student’s information, those changes automatically flow through to linked records and forms, so you don’t have to repeat the same fixes in multiple places.
Core features
- Single-view entry: Everything is on one screen, so you can finish in seconds.
- DepEd compliance: Includes fields like LRN, Indigenous Status, and Mother Tongue.
- File upload: Accepts .csv and .xlsx files via drag-and-drop or file picker.
- Duplicate detection: Flags students who already exist in the system to avoid double enrollment.
- Bulk validation: Checks all rows for missing or invalid data before processing.
- Template download: Provides a ready-made CSV template so your columns match system requirements.
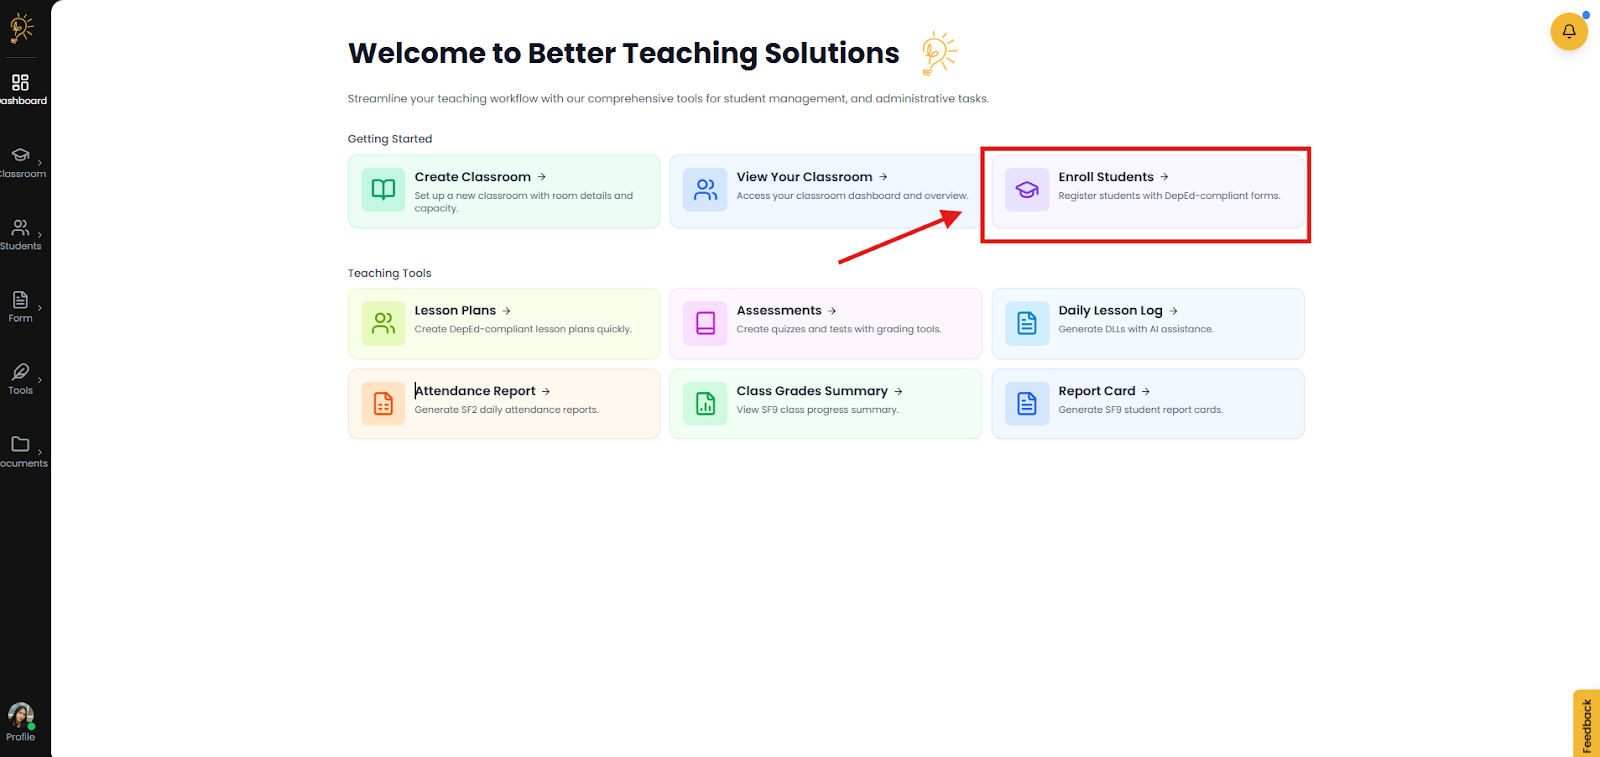
Step 1: Open the enrollment page
From the Dashboard, look for the Enroll Students card under the Getting Started section.
- Click Enroll Students to begin the enrollment process.
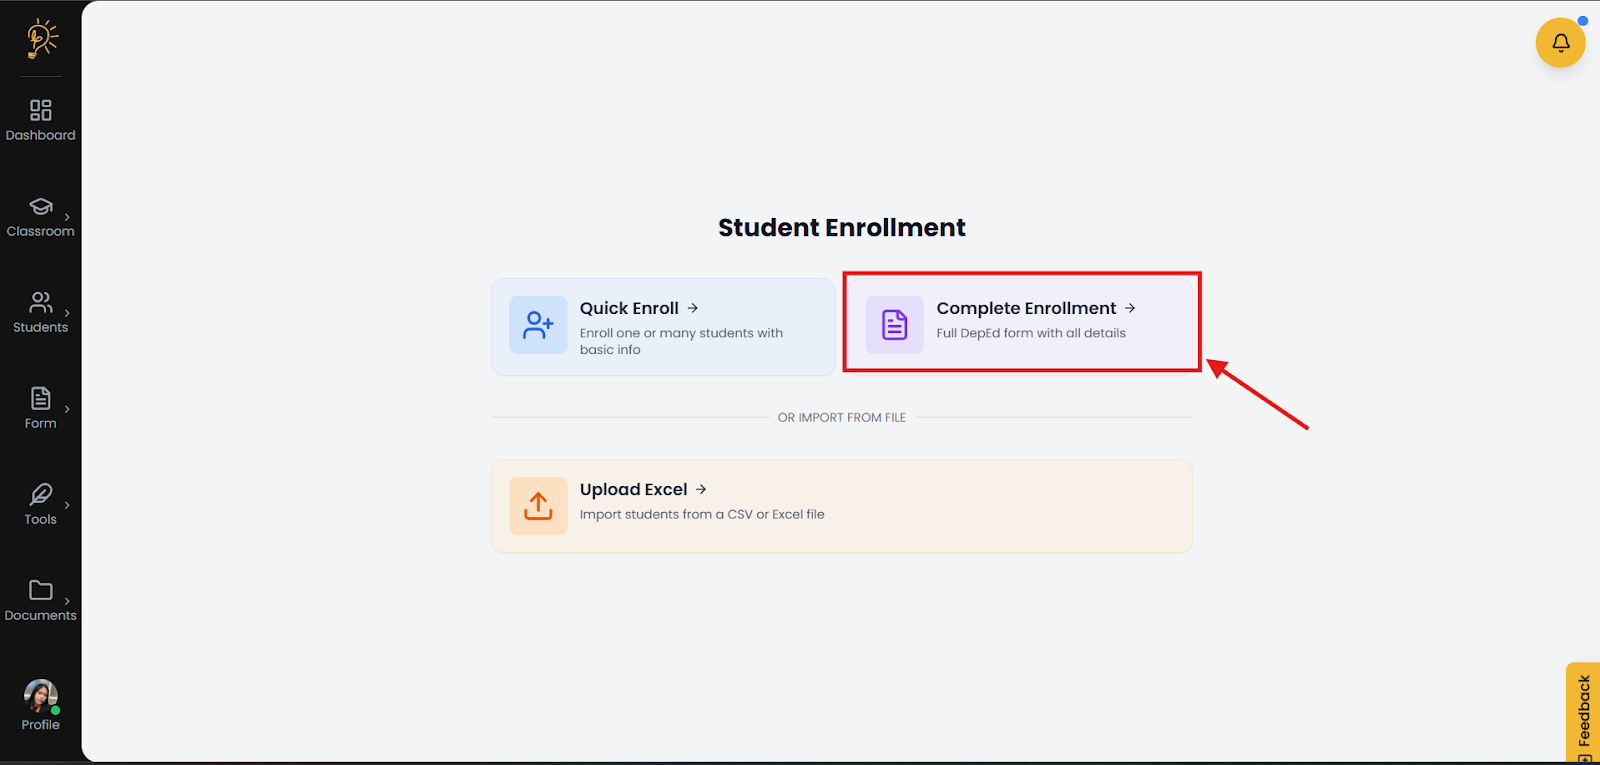
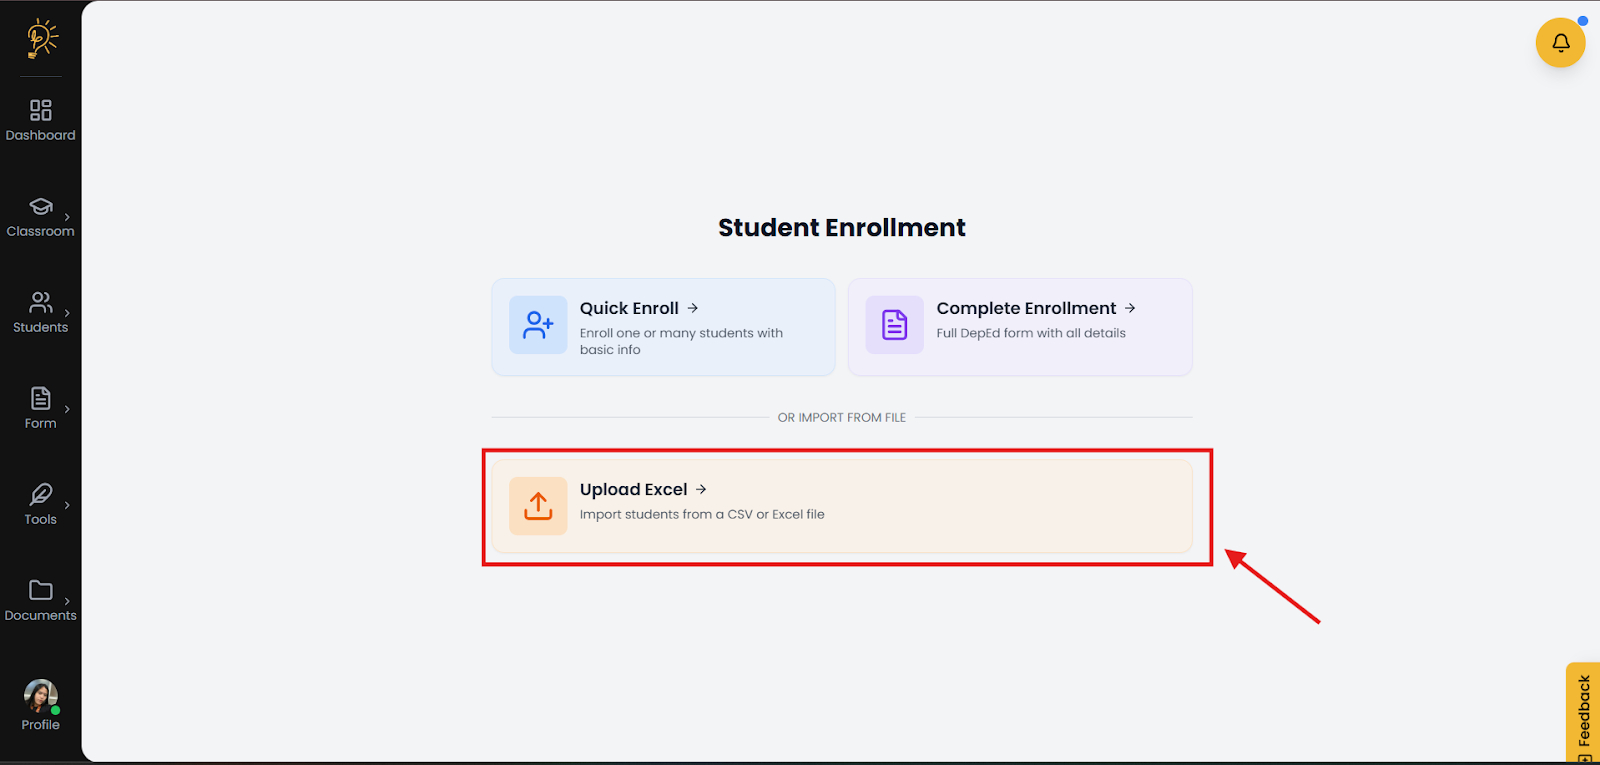
Step 2: Choose how you want to enroll students
Pick the option that works best for the information you have.
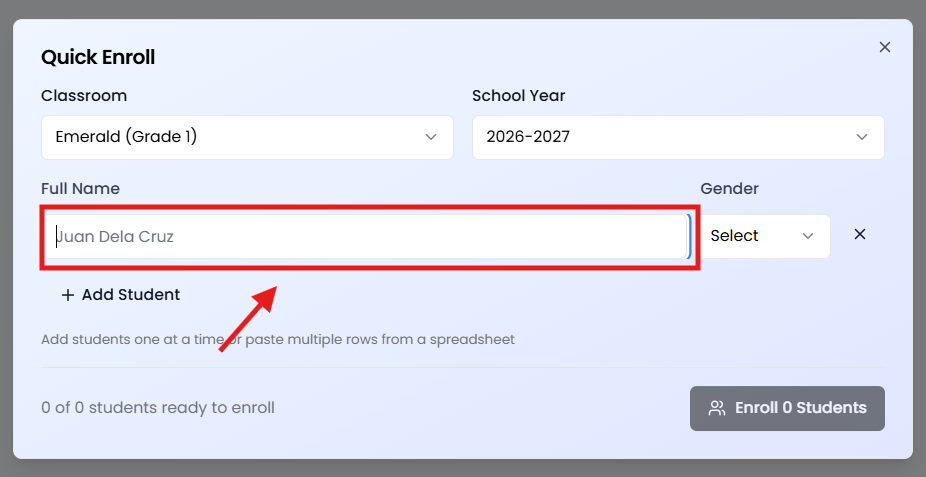
A. Quick Enroll (Fast and Easy)
Use this when you only have basic details like name, gender, and birthdate.
- Select the Quick Enroll.
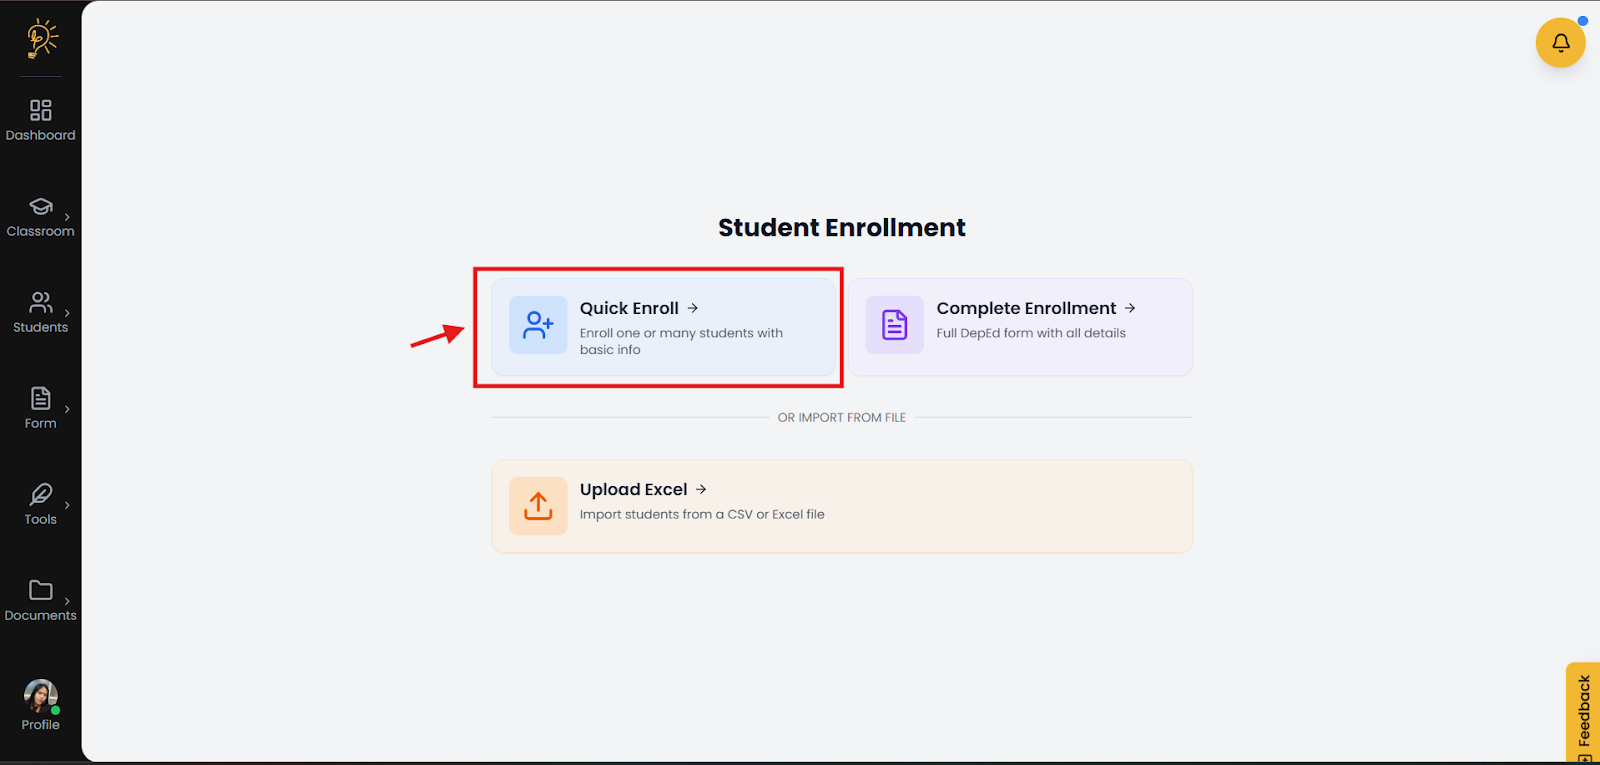
- Select the Classroom where you want to enroll the student.
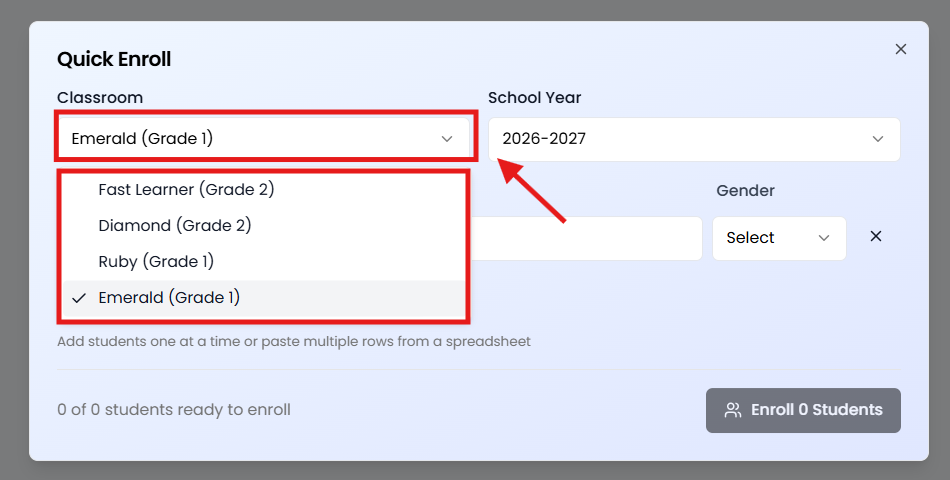
- Enter the student’s First Name and Last Name.
- Select the student’s Gender.
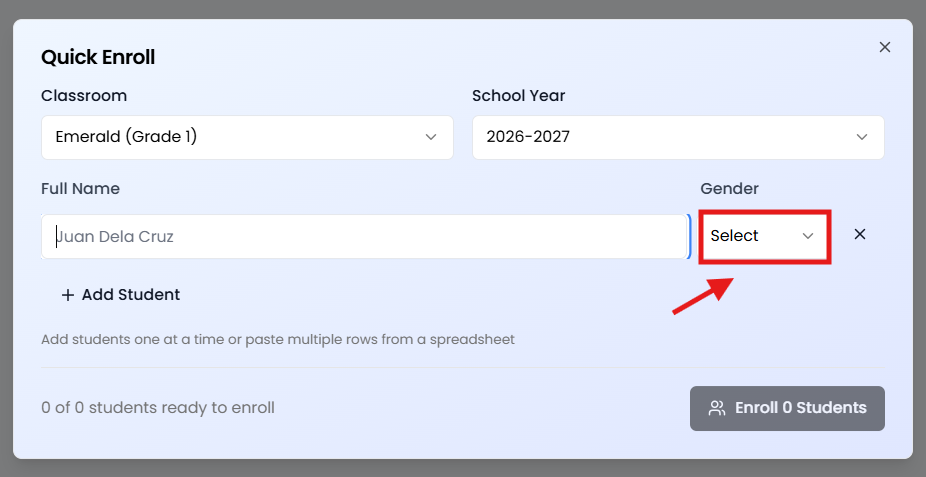
- You can select the add student button to create a new row to input a new student.

- Click Enroll Student to save. A pop-up will show to confirm the enrollment of the student.

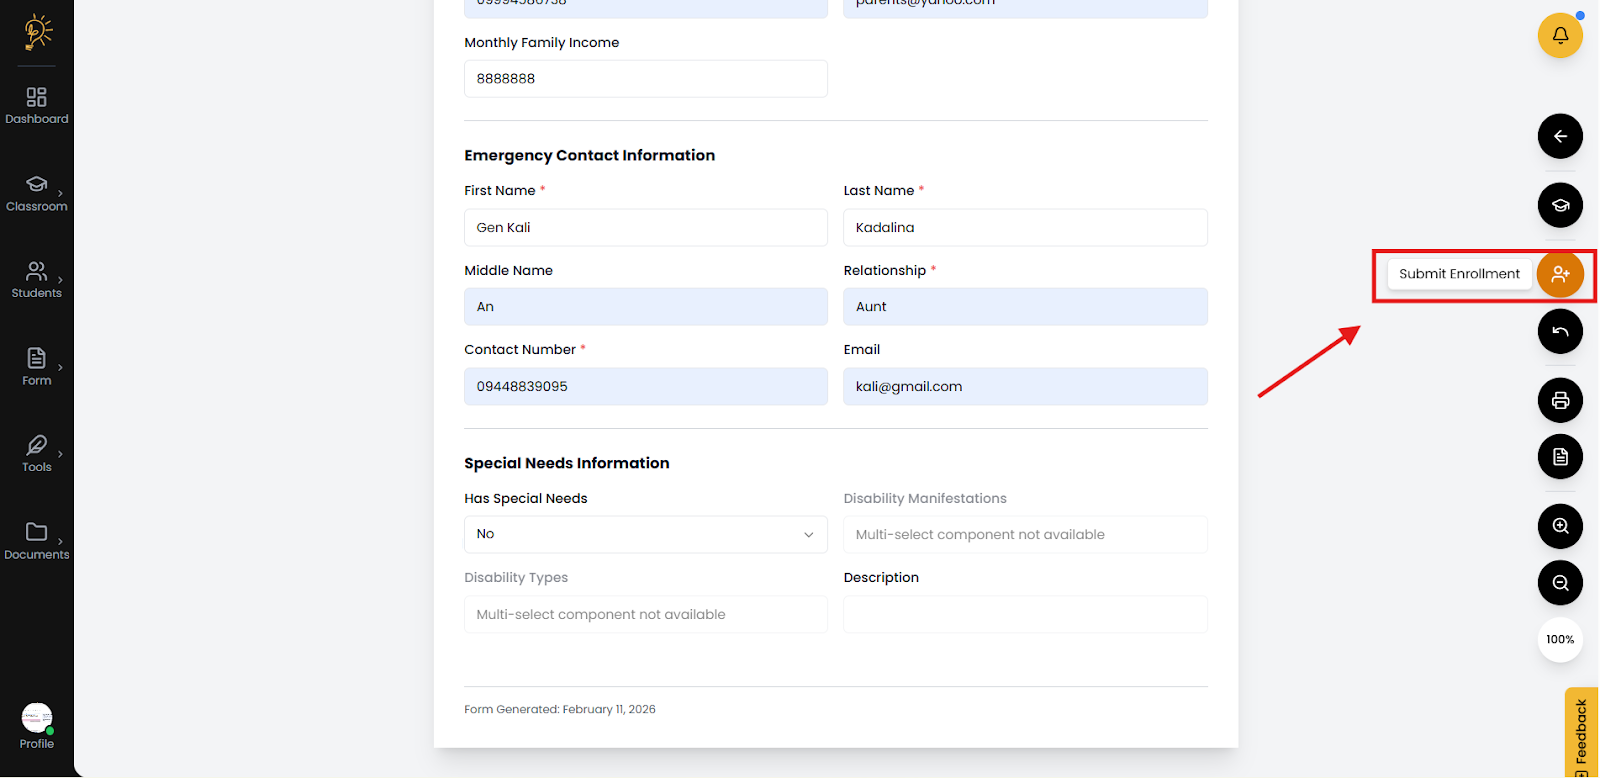
B. Complete Enrollment (Full DepEd Form)
Complete Enrollment is for full, DepEd-compliant registration that feeds official forms like SF1, SF2, and SF9.
- Fill out the Student Information section.
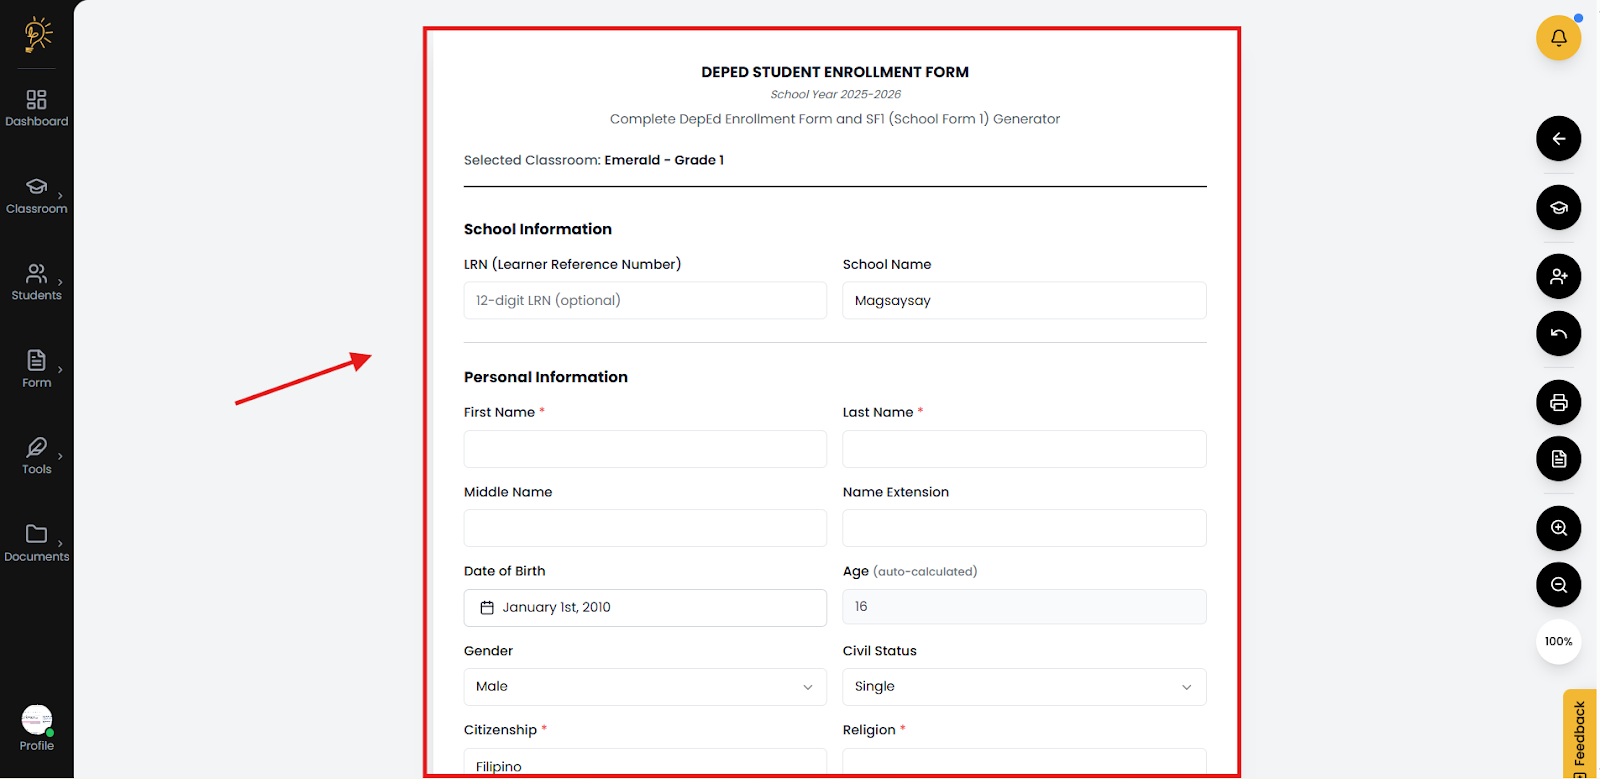
- After filling out the submit button to the right side will change color to indicate that it is ready for submitting.
- Click Enroll Student to save the full record.
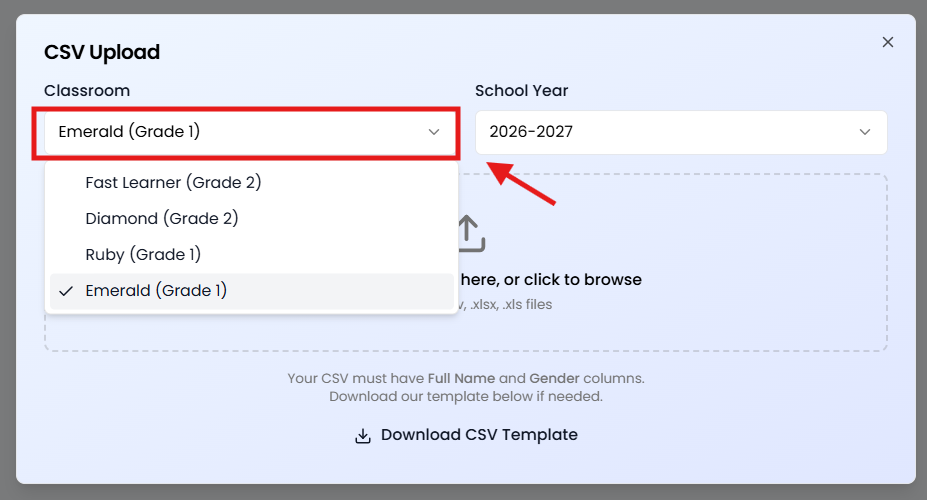
C. Upload Excel / CSV (For Many Students)
- Select the Upload Excel.
- Select a classroom where the student will be enrolled.
- Download the Excel file template.
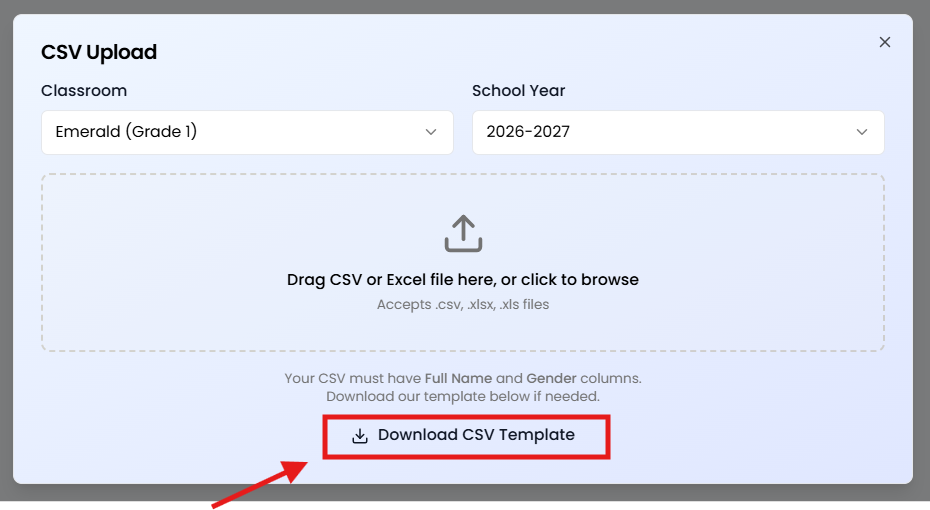
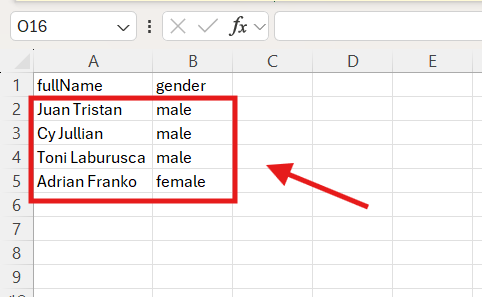
- Open the excel file and fill out the table with the student name (first, middle, then last name) and gender then save the file.
- Upload the file to the BTS CSV upload. The students will be then loaded and updated student names.
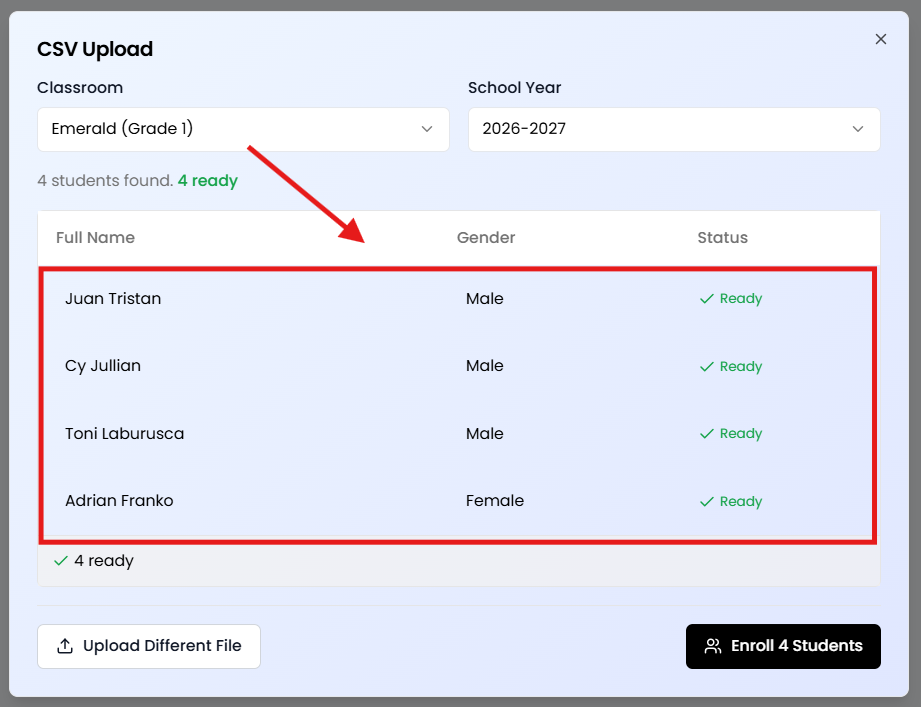
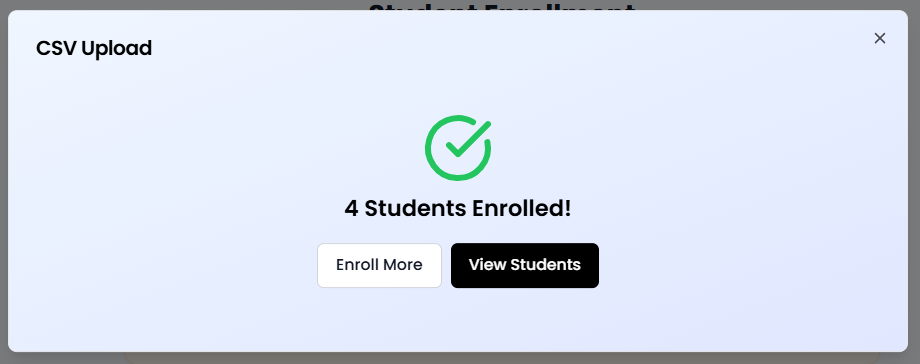
- Select enroll and a pop up will confirm the student enrollment.
enroll studentsrecordsformsenrollstudents
Author
Better Teaching Solutions
Making teaching easier, giving more time for our hard working teachers!